
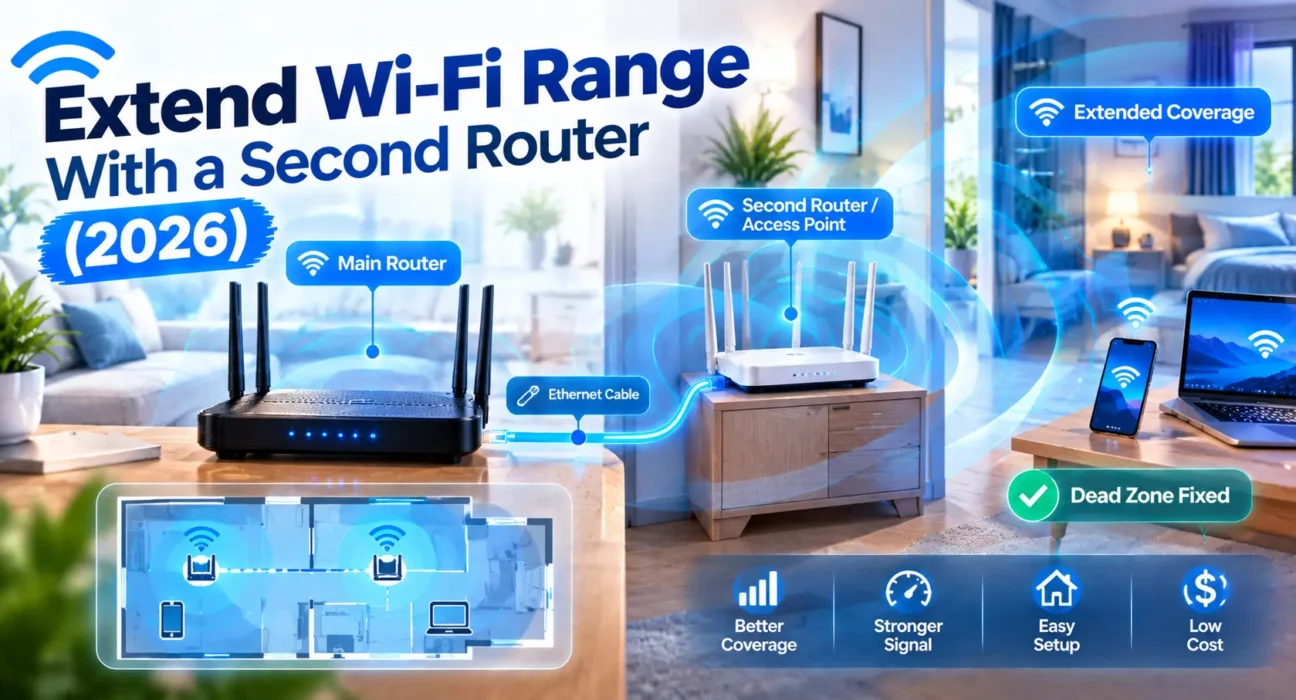
Got an old router sitting in a drawer and a dead zone at the other end of the house? You don’t necessarily need to buy a mesh system. A second router, set up the right way, can extend Wi-Fi range with a second router just as effectively – sometimes better – as a dedicated extender, and it costs nothing if you already own one.
Tested with TP-Link, Netgear, and Asus routers as secondary access points, comparing wired Access Point mode against wireless bridge/repeater mode for real-world speed and reliability.
Here’s the thing most people get wrong: plugging a second router into your main one doesn’t automatically extend your Wi-Fi. Leave it in its normal “Router” mode and you’ll end up with two separate networks fighting each other, weird connectivity issues, and devices that randomly can’t reach things on the other network. The second router needs to be reconfigured specifically as an access point – a completely different mode – before it actually helps.
This guide walks through the two real ways to do it, which one you should actually use, and the exact setup steps.
⚡ Extend Wi-Fi Range With a Second Router — The Short Version
If you just want the bottom line before reading the details:
No Ethernet available? Use Bridge or Repeater mode instead. It’s easier to place since there’s no cable to run, but expect roughly half the speed, since the second router splits its radio between talking to the main router and talking to your devices.
Access Point mode is the method WekyTech recommends for the vast majority of setups. It’s not fundamentally different from how a mesh system’s satellite nodes work – the difference is you’re doing it manually with equipment you already own, for free.
🔍 Which Method Fits Your Situation?
| Your Situation | Best Method | Why |
|---|---|---|
| Can run an Ethernet cable between rooms | Access Point (AP) mode | Full speed, most reliable, no wireless bottleneck |
| Running a cable isn’t practical | Bridge or Repeater mode | No cable needed, but roughly half the throughput |
| Second router is 8+ years old | Use for a low-speed area only | Fine for a smart thermostat, not for streaming or gaming |
| Want seamless roaming between rooms | Same SSID, non-overlapping channels | Devices switch access points automatically without dropping |
| Want to cover an outdoor area | Neither – use an outdoor-rated access point | Indoor routers aren’t weatherproofed or surge-protected |
| Already own compatible mesh hardware | Use a proper mesh node instead | Purpose-built for this, handles roaming more smoothly |
✅ Access Point Mode vs. Bridge Mode — Compared
Comparison based on WekyTech’s own testing setting up TP-Link, Netgear, and Asus routers as secondary access points in typical home layouts.
| Factor | Access Point (Wired) | Bridge/Repeater (Wireless) |
|---|---|---|
| Setup difficulty | Moderate – needs a cable run | Easier – no cable needed |
| Speed | Full speed, no penalty | Roughly 40-50% slower |
| Reliability | Very stable | More sensitive to walls and interference |
| Placement flexibility | Limited by cable length | Anywhere with decent signal from the main router |
| Best for | Home offices, streaming, gaming rooms | Casual browsing, smart home devices |
How to Set Up a Second Router in Access Point Mode
Step 1: Change the Second Router’s Local IP Address
Log into the second router’s admin page and change its local IP address to fit your main network subnet. For instance, if your primary router uses 192.168.1.1, set the second router to something like 192.168.1.2 or 192.168.1.250. Make sure this IP is outside your main router’s active DHCP pool (or reserve it) to prevent duplicate IP conflicts. Write this down—you’ll need it to log back in later.
Step 2: Disable the DHCP Server
This is the step people skip most often, and skipping it causes real problems. With two DHCP servers running, both routers try to hand out IP addresses independently, which leads to conflicts and devices that randomly lose their connection. Find DHCP Server in the settings and turn it off on the second router – your main router should be the only one assigning addresses.
Step 3: Run the Ethernet Cable and Connect It Correctly
Connect an Ethernet cable from a regular LAN port on your main router to a regular LAN port on the second router. If you are configuring an older router manually, avoid using the WAN/Internet port. However, if your router has a dedicated native AP Mode switch in software, modern firmware from TP-Link, Asus, or Netgear will automatically convert the WAN port to act as a standard LAN uplink port once enabled.
Step 4: Switch the Wireless Mode to Access Point
Look under Advanced Settings > Operational Mode and switch it from “Router Mode” to AP (Access Point) Mode. On modern routers, toggling this native AP mode toggle often automatically disables the DHCP server and rebridges the WAN/LAN ports for you in one single click.
Step 5: Set the SSID and Password
You’ve got two solid options here. Use the exact same network name and password as your main router for seamless roaming – your phone switches between the two automatically as you walk through the house without you noticing. Or use a distinct name if you specifically want to control which access point a device connects to. Most people are happier with the same name.
Step 6: Choose a Non-Overlapping Wi-Fi Channel
If you’re using the same SSID on both routers, set them to different, non-overlapping channels so they don’t interfere with each other. On 2.4GHz, pick two different channels from 1, 6, or 11. On 5GHz, choose channels with enough separation – check your router’s channel list for recommended non-overlapping pairs.
Step 7: Save, Then Reconnect at the New Address
Save your settings and apply them. The second router will restart and take on its new IP address, so you’ll need to reconnect to it at the address you set in Step 1 if you need to make further changes later.
How to Set Up Bridge or Repeater Mode Instead
If running a cable genuinely isn’t an option, most routers less than eight years old support Bridge, Repeater, or Range Extender mode in their wireless settings. Look under Wireless or Advanced Setup for one of these options, connect it to your main router’s Wi-Fi signal during setup, and it’ll rebroadcast that signal from its new location. Keep in mind: since the router’s radio has to both receive the main signal and rebroadcast it to your devices, you’re roughly cutting the available bandwidth in half compared to a wired access point.
🔄 When to Consider a Different Solution
| Situation | Better Option |
|---|---|
| Need coverage across a very large home | A proper mesh system designed for whole-home roaming |
| Second router doesn’t support AP or Bridge mode | Flash it with third-party firmware like DD-WRT, or replace it |
| Need to cover a detached garage or outdoor area | An outdoor-rated access point, not an indoor router |
| Want the absolute simplest setup with no configuration | A plug-and-play Wi-Fi extender, accepting the speed trade-off |
📋 Quick Summary Table
| Method | Best For |
|---|---|
| Access Point mode (wired) | Best overall – full speed, most reliable |
| Bridge/Repeater mode (wireless) | No cable available, casual use is fine |
| Same SSID, different channels | Seamless roaming between rooms |
| Third-party firmware (DD-WRT) | Older router without native AP/Bridge support |
| Mesh system | Large homes, want the simplest ongoing management |
❓ FAQ — Extending Wi-Fi Range With a Second Router
Q: Can I really use an old router to extend my Wi-Fi for free?
Yes, as long as it supports Access Point or Bridge/Repeater mode, which most routers made in the last eight years do. It won’t match a brand-new mesh system in polish, but it genuinely extends coverage at zero extra cost.
Q: What happens if I just plug a second router in without changing any settings?
You’ll end up with two separate networks, likely IP conflicts from competing DHCP servers, and devices that behave unpredictably. The second router has to be switched to Access Point or Bridge mode to work correctly.
Q: Should both routers use the same Wi-Fi name?
For most households, yes – it lets your devices roam between the two automatically as you move through the house. Use different channels on each to avoid interference between them.
Q: Is Bridge mode as good as a wired Access Point setup?
No, it’s noticeably slower – typically around 40-50% less throughput – because the router’s radio has to split its time between receiving and rebroadcasting the signal. Use it only when running a cable genuinely isn’t possible.
Q: What port do I plug the Ethernet cable into on the second router?
If configuring manually, plug into a regular LAN port. If your router has a native software toggle for AP Mode, modern firmware converts the WAN port into a functional LAN port automatically.
Q: When should I just buy a mesh system instead?
If you need coverage across a genuinely large home with smooth roaming and minimal ongoing configuration, a proper mesh system is purpose-built for that and handles the handoff between nodes more gracefully than a DIY setup.
Final Thoughts
A spare router isn’t just clutter – set up correctly in Access Point mode, it can close a Wi-Fi dead zone just as well as gear you’d pay for. The setup takes twenty to forty minutes and a handful of settings changes, and the payoff is real: full-speed coverage in a spot that used to be a dead zone. If you can run a cable, do it that way. If you can’t, Bridge mode still beats living with no signal at all.
👉 Read next: Router Not Broadcasting Wi-Fi Fix
👉 Also useful: Can’t Access Router Admin Page Fix